We discussed android a lot in previous articles. Now let's begin to code. Before that, we need to know about Android Studio.
Android Studio is the official Integrated Development Environment (IDE). Before reading this you should read this portion.
Android Studio is the official Integrated Development Environment (IDE). Before reading this you should read this portion.
Why we need the Android studio
- A flexible Gradle-based build system
- A fast and feature-rich emulator
- A unified environment where you can develop for all Android devices
- Instant Run to push changes to your running app without building a new APK
- Code templates and GitHub integration to help you build common app features and import sample code
- Extensive testing tools and frameworks
- Lint tools to catch the performance, usability, version compatibility, and other problems
- C++ and NDK support
- Built-in support for Google Cloud Platform, making it easy to integrate Google Cloud Messaging and App Engine
Now Download Android Studio and other tools. I mentioned about tools in here.
Let's create a HelloWorld Application.
Let's create a HelloWorld Application.
Create a New Project in Android Studio
- Open Android Studio
- Click 'Start a new Project studio project'
- Enter project Details like
- Name - Name of the app and the first letter should be capital. example: HelloWorld
- Package - The name of Java Package, it is used to organize Java classes into namespaces example: com.helloworld.program
- Project Location - Set location on your drive
- Click Next
- Select Minimum SDK Version - Already selected option is 14, that version has all device support
- Click on Next
- Select An Activity like Blank Activity
- Next
- Finish
Then Android Studio loads its components.
Connect your mobile with PC. Open settings and enable USB Debugging.
Then click on this icon.
This is the Main Activity of your app.
package com.example.helloworld;
import android.support.v7.app.AppCompatActivity;
import android.os.Bundle;

public class MainActivity extends AppCompatActivity {
   @Override
   protected void onCreate(Bundle savedInstanceState) {
      super.onCreate(savedInstanceState);
      setContentView(R.layout.activity_main);
   }
}
Connect your mobile with PC. Open settings and enable USB Debugging.
Then click on this icon.
Now choose your device.
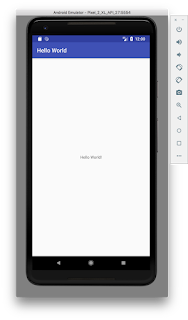
After opening on mobile your activity will run like this.
- Aswin Bhim Nath


Comments
Post a Comment